include 引入布局
实现简单的自定义标题栏
title.xml
1 |
|
在别的地方引用这个title.xml绘制的标题栏只需 <include layout="@layout/title"/>
1 |
|
然后将自带的标题栏隐藏掉:
1 | protected void onCreate(Bundle savedInstanceState) { |
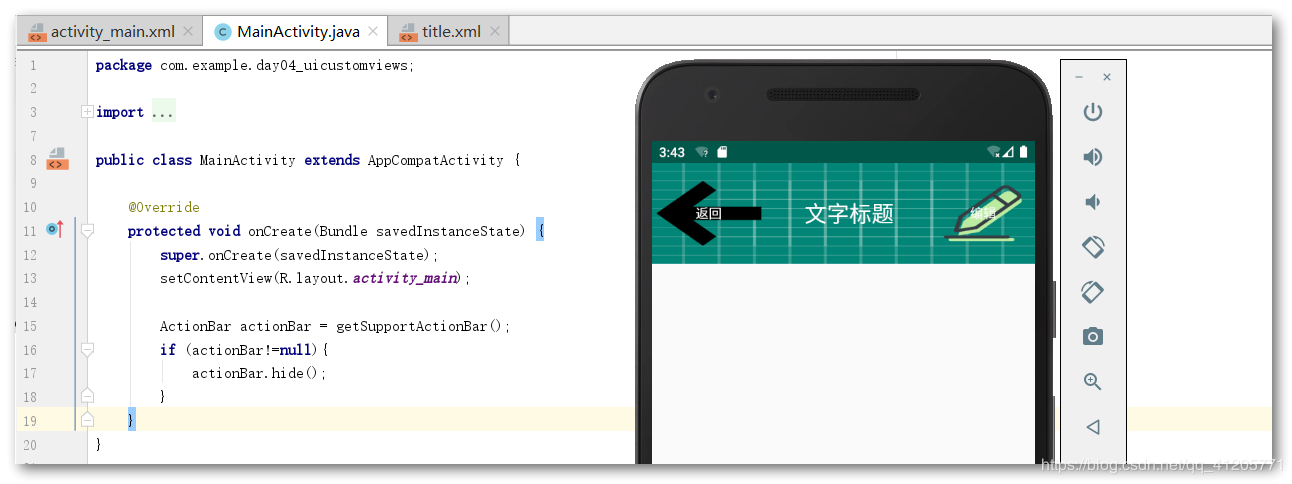
效果如图:
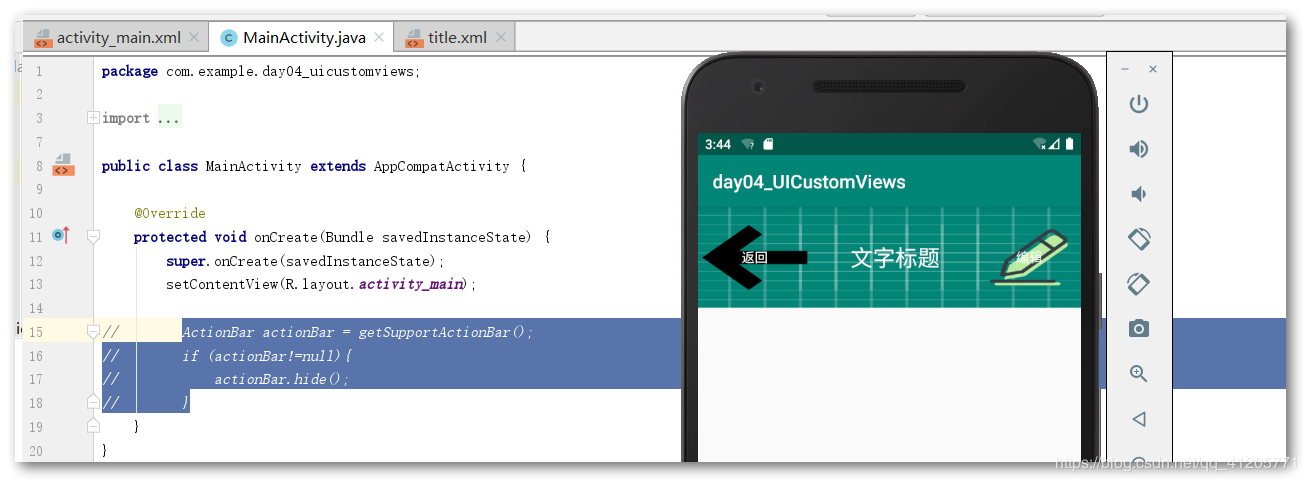
不隐藏的话,就会造成如下图情况:
创建自定义控件
问题引出:像上面的例子,自定义了标题栏,要给返回按钮添加点击事件,如果在每一个活动中都需要重新注册一遍返回按钮的点击事件,无疑会增加很多重复代码,因此我们可以使用自定义控件来解决
新建TitleLayout继承LinerLayout,让它成为我们自定义的标题栏控件,代码如下
1 | public class TitleLayout extends LinearLayout { |
我们首先重写了LinearLayout中带有两个参数的构造函数,在布局中引入TitleLayout控件就会调用这个构造函数接下来需要对标题栏布局进行动态加载,这就需要LayoutInflater了其from()方法可以构建出一个LayoutInflater对象其inflate()方法可以动态加载布局文件,需要两个参数:加载布局文件的ID和加载好的布局的父布局
引入自定义控件
添加自定义控件时,我们需要指明控件的完整类名,包名时不可省略的1
2
3<com.ccc.newlearn.util.TitleLayout
android:layout_width="match_parent"
android:layout_height="wrap_content"/>为自定义控件注册按钮点击事件,这样每当我们在一个布局中引入TitleLayout时,返回按钮和编辑按钮点击事件就已经自动实现好了,省去了很多重复的代码工作1
2
3
4
5
6
7
8
9
10
11
12
13
14
15
16
17
18
19
20
21
22public class TitleLayout extends LinearLayout implements View.OnClickListener {
public TitleLayout(Context context, @Nullable AttributeSet attrs) {
super(context, attrs);
LayoutInflater.from(context).inflate(R.layout.title, this);
Button titleBack = (Button) findViewById(R.id.title_back);
Button titleEdit = (Button) findViewById(R.id.titile_edit);
titleBack.setOnClickListener(this);
titleEdit.setOnClickListener(this);
}
//getContext()获取当前对象所在的Context
public void onClick(View v) {
switch (v.getId()) {
case R.id.title_back:
((Activity) getContext()).finish();
break;
case R.id.titile_edit:
Toast.makeText(getContext(), "点击了编辑", Toast.LENGTH_SHORT).show();
}
}
}